Sadie’s on the Naughty List

IMG_7619_edited-1red

Alternate title: My mother-in-law is a saint.

My mother-in-law was nice enough to watch Sadie for a weekend in November and a week in December while we went on much needed vacations.

We thought we had her house locked down.  There were baby gates blocking the cats’ area and the basement.  The pantry cabinet was clamped shut with a bungee cord and Sadie still got into trouble both visits. Between the two visits she ate:

  • Can of Pringles (from the pantry tied up with a bungee cord – I don’t understand how – it was still tied up when she got home)
  • Loaf of bread and sandwich thins (see pantry above)
  • Handmade turtles (the candy) in tins ready to deliver to the neighbors
  • Box of cherry cordials wrapped and under the tree for a gift
  • Sprinkles for decorating cookies with the grandkids
  • Bags and bowls of cat food (broke down the baby gate to get in there!)
  • Cleaned out the litter box (broke down the baby gate multiple times!)
  • Scattered her make up bottles and lipstick all over the upstairs hallway
  • Dug in the kitchen trash every time she was left in the house.  Fortunately, no food was in there.  Sadly, that lesson was learned on a previous visit.

We were mortified!  The worst part?  My mother-in-law slept on the sofa multiple nights since Sadie had to go out so often with an upset tummy.  She was so glad to see us take Sadie so she could get a normal night’s sleep!

But other than that she was an angel…

IMG_7773_edited-1web

Looks like we’ll have to learn how to crate train a 5 yr old dog who hates being confined so much she bends the crate door to get out.  Wish us luck!

Hey, is Anybody There?

Nope this page isn’t defunct though you wouldn’t be blamed for thinking that.  I can’t believe it’s been over eight months since I posted!  It certainly didn’t feel like that long but my home page doesn’t lie. Time sure got away from me!  Fall is always a crazy time for work and this year I had a lot more travel.  I did sew a few things this summer but lost the motivation to go through the hassle of photographing myself (I still dread that part).

However, every time I think about making a pattern I scour the internet to see what I can learn from other’s reviews. I feel like when I’ve finished something I should share my thoughts too.  I know I appreciate those posts that are honest and real. I also refer back to my own posts when making a garment again – they remind me of any sizing or construction issues and I like having a visual record of what I make.

So this is going to be a catch-up post.  I completed several garments over the summer and want to share them even if I did take the all the photos on my dressform.  Here are the cliff notes reviews:

New Look 6303 / S0599

IMG_4855_edited-1red IMG_4853_edited-1red

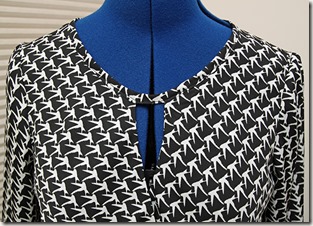
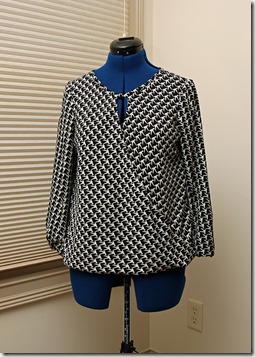
This is probably my favorite garment from this summer and fall.  It looks the most like a ready to wear garment I would buy.  In fact, after I cut the fabric, I realized I had bought almost the exact blouse from Nordstrom a few months earlier. No wonder I liked it!  You can’t see it here but I sewed the version with the draped front and longer shirt tail hem in the back. 

  • The blouse is more drapey and not as blocky looking as it looks above.  The dress form was at a strange angle.
  • Very easy to make. 
  • Even though tacked, the front can flap open so needs a camisole underneath.
  • It’s wearable but just a bit too short so when I cut a second version (still not sewn), I added length to the front and back.

Sewaholic Saltspring

IMG_4865_edited-1red IMG_4816_edited-1red

I guess I did take a photo of my blue Saltspring back in July! Some notes:

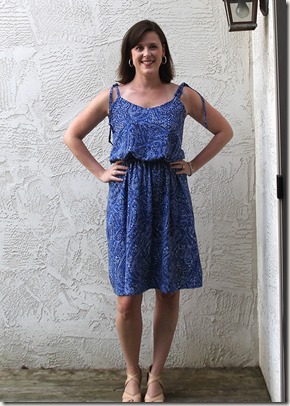
  • Size 8 throughout.  Measurements indicate size 10 in bodice and 8 in skirt.
  • Blue version is a linen.  This fabric is good and bad: it’s opaque enough to not require lining but can be thick through the gathers. I also left off the pockets to reduce bulk.
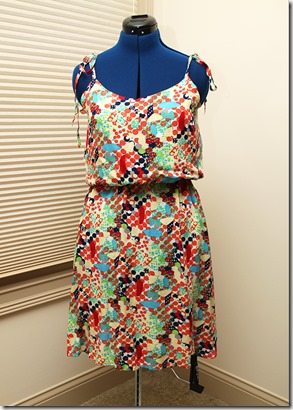
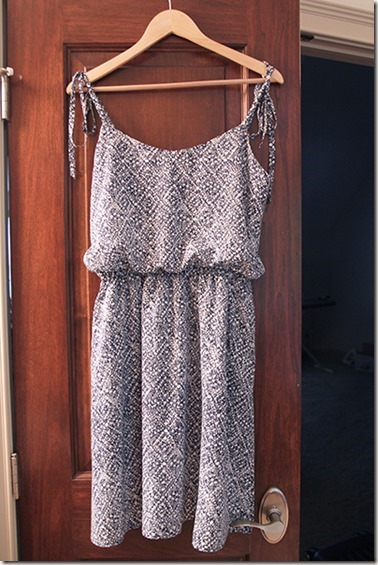
  • The print version is a rayon challis and is fantastic.  It’s so much more light and airy.  I lined the bodice in ambiance rayon.  I chose not to line the skirt but will need a slip.  Adding a lining as per the Sewaholic sew-along would result in two layers with gathers adding thickness around the waist.
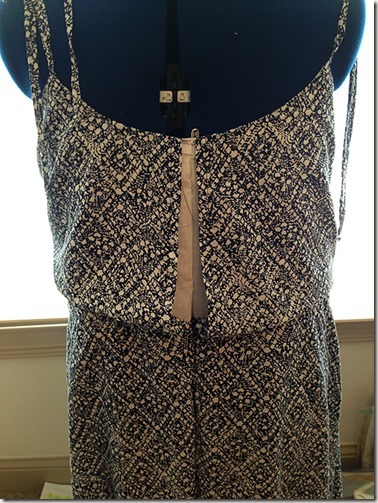
  • Left off the zipper.  There are a couple steps needed if you want to eliminate the zipper.  As far as I could figure out, between steps 8 and 9, sew the back seam of the bodice lining then sew the back seam of the bodice outer fabric before attaching it to the skirt. Between steps 13 and 14, leave a 2” hole when topstitching to feed the elastic through the casing.

Sewaholic Belcarra

IMG_4850_edited-1redIMG_4851_edited-1red  IMG_4848_edited-1red

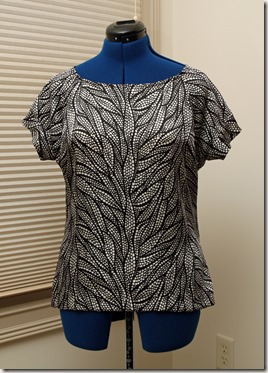
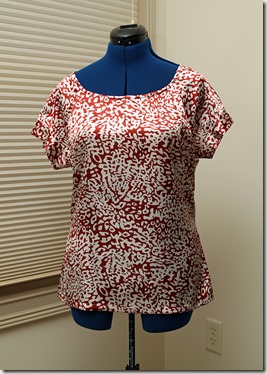
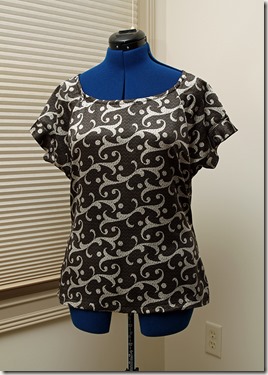
This is a great basic blouse.  I made these to wear under blazers or cardigans for work.  Not much to say – I made the most basic version and didn’t even add the pocket.  I made a straight size 8.  Easy to make and very wearable.

Foxglove Tank

IMG_4862_edited-1redIMG_4863_edited-1red  IMG_4860_edited-1redIMG_4861_edited-1red 

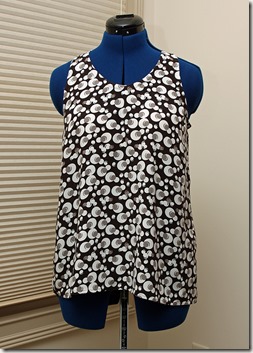
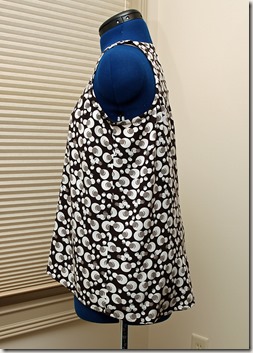
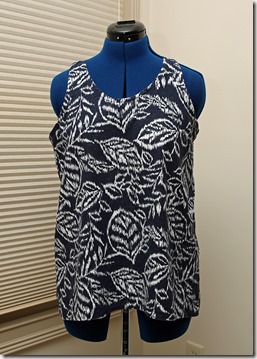
I’ve been trying to find a pattern similar to ready-to-wear tanks I’ve bought.   This is a good basic tank with a high-low shape. It’s fitted through the chest and loose below.  I ended up making a ton of changes and at least three versions before I found one that worked well.

  • I love how Lauren set it up so you can select and print just the size you want.
  • Great instructions.
  • Definitely use a drapey fabric.  You can see the difference above.  The navy floral is linen (or a linen/rayon blend, I forget) and the chocolate and white dots is rayon challis.
  • Size eight as a base.  I cut both pieces on the fold.
  • I didn’t like the drastic difference between the front and back length for versions I’d wear with shorts.  I added 1.5 inches to front, shortened the back by 2 inches. I may add an inch back to the back, particularly if worn with jeans.
  • Scooped out the armhole to get more room.  It was a bit snug all throughout the back and chest and tight under the arms.  I didn’t want to mess with the racer back so I made the armhole bigger and added a 1/4 inch under each arm.  Maybe I could have gone up a size but there was no way I was reprinting and retaping another size.
  • Reduced the width at the bottom (I think 2 inches total – can’t remember). Probably not needed if your fabric has a lot of drape.
  • Even though I used the exact same pattern, the blue version has plenty of room in the arms, the brown version is tight through the arm/chest.  I think it’s because I used ready made bias binding for the brown and it doesn’t stretch much.  The blue version has self made linen bias tape which I believed stretched as I sewed it on.  It makes it hard to know whether I need to give myself more room next time around.
  • Once you have the pattern how you want, it’s a super fast make and a great pattern for fun prints!

New Look 6283

IMG_4858_edited-1red

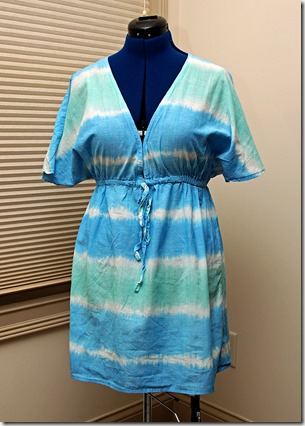
This swimsuit cover-up is probably the least exciting but definitely got the most wear this summer.  It looks a bit tired in the photo above since I wore it every weekend and for hours every day on vacation.  It’s the perfect cover-up.  Loose but not a shapeless sack, full coverage but still cool and airy.  I’ll definitely make at least one more version since this gets washed so often.  I’ll probably add 2-3 inches next time since it seems to shrink over time even with pre-washing the fabric.  I’d definitely recommend this quick, easy pattern.

Hot Patterns Medina mini-kaftan

IMG_4856_edited-1redIMG_4857_edited-1red 

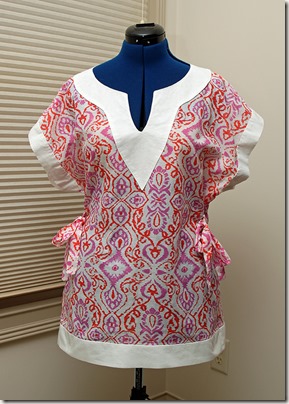
It’s a free pattern from fabric.com which is fantastic.  This had so much potential but ended up as a fail.  Luckily I made it out of $3/yd fabric so no great loss.  It was voile I bought online and was disappointed to see how thin it was when it arrived. It worked for a cover-up, not for anything else. Couple notes:

  • Don’t accidentally chop off 6 inches instead of 3 like I did.  D’oh! No idea how I did that.  It’s so short, it’s un-wearable.  Well, assuming I want my rear covered… Anyone 5’3” or below want a cover-up?
  • The directions don’t walk you through every step or hand-hold.  You definitely need some experience before trying the pattern though the actual construction is not difficult at all.
  • The V section needs to be a opaque fabric or use thick interfacing.  Otherwise you’ll see the edges from underneath.  They have you fold down the edges of the contrast V, place it on the blouse and topstitch on.
  • Waistline is low – I’d raise it next time if I make it again.
  • It’s a cute, flattering style.

Well, I’m all caught up.  I really hope I get more opportunity to sew in the new year.  Maybe I’ll even post more often than every 8 months! 

Have a Happy Thanksgiving!

Cuckoo for Coco

IMG_4562_edited-1web

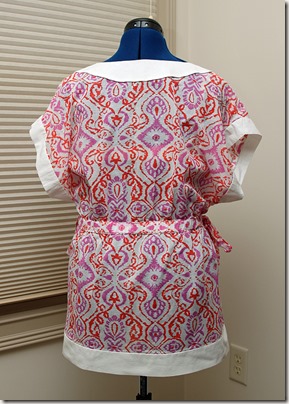
The new Coco pattern from Tilly Walnes of Tilly and the Buttons has been popping up all over the internet.  I immediately thought it was adorable.  It was so basic, though,  I questioned whether it was worth purchasing.  As I saw more examples I realized it’s actually a perfect transitional piece and one that’s extremely wearable.  It’s longer and more polished than a t-shirt and can be worn year round.

I bought the pattern for the funnel neck which I think is a super cute retro look without being costumey.  When I went to make my versions, though, I was hesitant.  I was worried my fabric wasn’t quite right – too thick and wouldn’t hold a press.  It would look like I had a short, misshapen turtleneck.  Now that I’ve seen more versions online, I think I’ll try one with some navy ponte I have.

IMG_4574_edited-1web

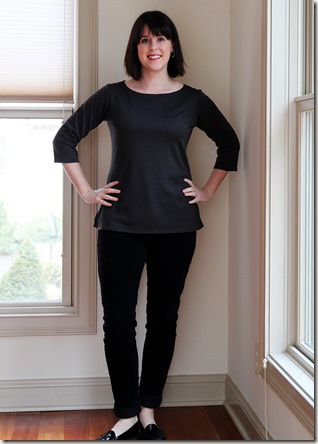
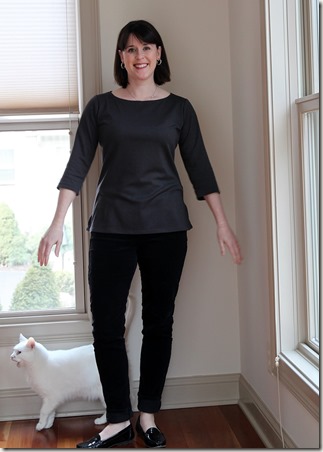
My first version was made from a gray ponte from Joann.  This fabric is a poly/rayon blend.  It’s soft and comfortable with just a teeny bit of stretch.  It barely wrinkles and is extremely easy to sew, though I fear it will pill in an instant.  I used a triple straight stitch for the neckline and finishing the sleeves and hem. I sewed the sleeve and side seams on the serger. I made a size 4 throughout.

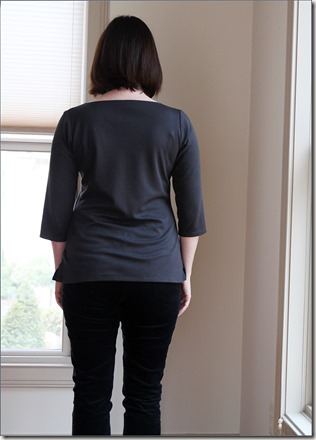
IMG_4579_edited-1web You can see it was a little too small through the high hip and rides up.  Or maybe I need a swayback adjustment?

IMG_4590_edited-1web Me in the middle of a turn and Ollie in the middle of squawking at me. We’re having all kinds of fun over here.

IMG_4557_edited-1web

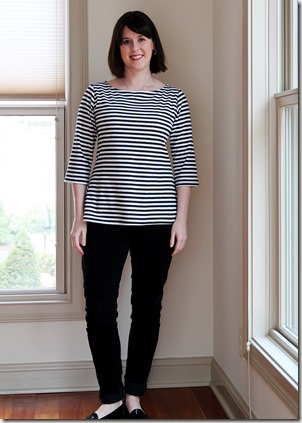
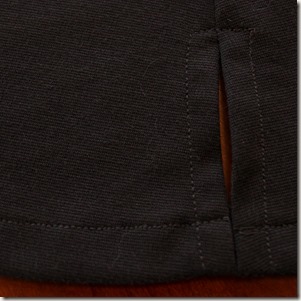
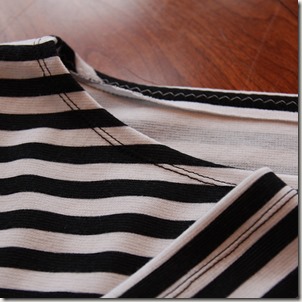
My second version was made of a striped ponte from Fabricmart.  It has a slightly different texture and is thinner.   I sewed a size 4 through the bust, sleeves and waist then graded out to a size 5 to the hip.  This fabric has a bit more stretch so it turned out a bit too big.  It’s mostly fine from the front but looks a little like a tent from the side. With this fabric I should have stayed with the size 4.  I still have the pooling at the lower back so that area must need some sort of swayback adjustment. I used the triple straight stitch for the side split but used a double needle for the neckline, hem and sleeves.

IMG_4444_edited-1web IMG_4443_edited-1web Triple straight stitch on gray, double needle on striped.

Sewing the top is a snap.  If you’re creative with folding you could probably squeeze it out of less than 2 yards, depending on your size.  In fact, I messed up the stripe matching and neckline (the triple straight stitch looked like crap on the striped fabric) so I scrapped my first try and cut new front and back pieces and still had fabric left over.

I definitely recommend the pattern, especially for beginners.  I’m sure for more experienced sewers there are less expensive options but since I’ll have used it at least 3 times, I’ve gotten good use out of it.

Vogue 8379

IMG_4266_edited-1web

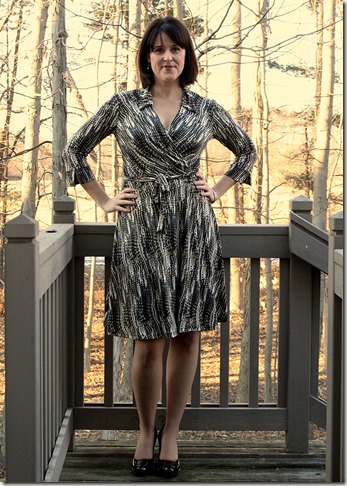
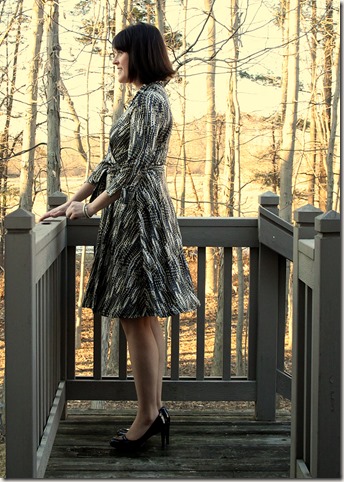
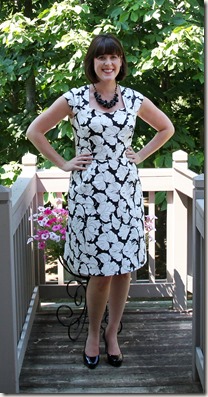
I’ve always loved the Diane Von Furstenberg wrap dresses and have been seeing lots of versions at various stores lately, probably due to the 40th anniversary of this iconic style. In truth, it has never been out of style.  You’ve got to admire a design with that kind of staying power.  I’ve read reviews of several total knock-off DVF inspired patterns  and decided to try Vogue 8379

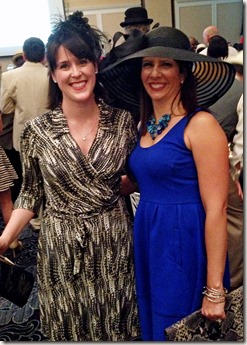
A friend of mine organized a charity fundraiser with a Kentucky Derby theme.  Since it was in March, I didn’t think I’d want to wear a summery dress.  Knowing I could always use a wrap dress or two on hand in my closet, I decided to make my first version out of a more sedate fabric I bought on sale (hello, $6 dress!) with the intention of making a version out of a fun floral for the party.  Life got in the way and I only had time to make the first version.  Other than the fascinator, I ended up being boringly dressed compared to the other party-goers which was a bummer.  I was surprised at how fancy people were. It was a fun event for a great cause which is what matters though!

My dapper husband and lovely sister in law!

Matt-and-me-derbyweb KC derby_edited-1

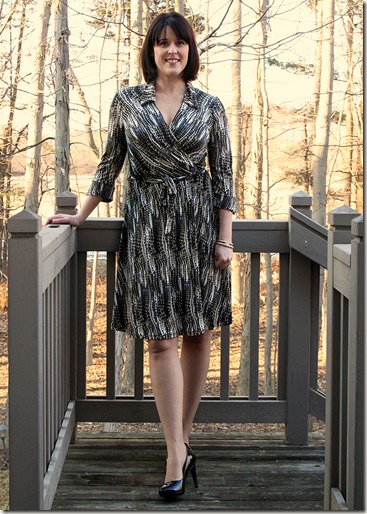
Anyway, on to the dress.  Occasion aside, it’s a great dress.  I’ve had some aggravating sewing fails the past couple months which I didn’t post so this was a satisfying project.

The fabric is ITY and very stretchy.  The pattern is drafted with 2” of ease which I don’t understand in a knit pattern.  I based my size off the finished garment measurement which was at least one size below what the size chart recommends.  I was nervous because it needed to be fitted but not skin tight.  ITY, in particular, can be thin and show white in the fibers when the fabric and print is pulled too tight.  I measured out the finished bust diameter on the fabric and wrapped it around me.  This really helped to confirm my size.  Every fabric has its own stretch and that was a good double check.

I made version B with the collars and cuffs.  I may try another with a more narrow skirt but I have to say I like the movement of the wider version.  Photo below taken after turning.  Whee!

IMG_4318_edited-1web

Adjustments:

  • Graded to a larger size in the waist and hips.
  • I shortened the skirt length by 2 inches at the shorten line.  To true up the grainline, I ended up losing 1” on the back pattern piece and 1.5” on the front pattern piece for a total of 5 inches of width.
  • Next time I will add back about an inch so I can have just a little more length and a deeper hem.
  • As noted in so many reviews, the bodice is really short.  I’m short-waisted so I didn’t lengthen it but it was borderline short even on me.
  • Constructed with a combination of my sewing machine using a triple straight stitch and my serger.  I don’t have a lot of control with my serger so the collar, facing, and sleeve head were done on the sewing machine.  All the rest of the seams were on the serger.  I should have done the cuff on the sewing machine too – they ended up looking stretched out and wonky.
  • Sewed the sleeves in flat. Sleeve seam and side sewed on serger.
  • The facings pop out easily.  I tacked them at the waist and shoulders which helped but wasn’t enough.  I put a couple squares of stitch witchery between the fabric layers which solved the problem.  Stitch witchery has no stretch so I applied them in small pieces, almost like big glue dots.

IMG_4310_edited-1web

I highly recommend this pattern and will definitely make more!

A Perfect Day for Stew

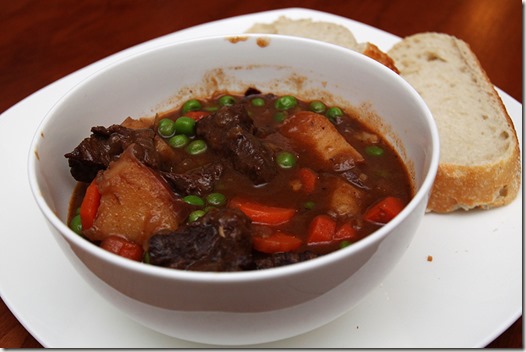
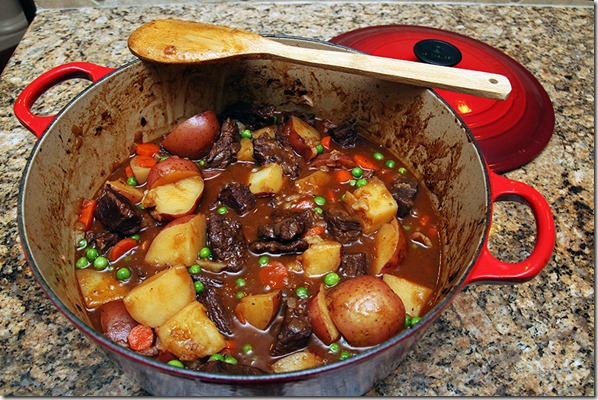
IMG_4018_edited-1web

Much of the country is dealing with temperatures lower than we’ve seen in a couple decades.  It’s no different here.  As I write this it’s –8 degrees with a wind chill of –33.  Ridiculous!

Today was one of the days I was thankful I worked from home.  Other than some trips to take the dog out, I stayed inside all day.  There will be more of the same tomorrow. Another reason I love working from home is if (and that’s a big IF) I have the ingredients for dinner, I can get a head start on it and continue to work while it cooks.

I love a classic beef stew.  It’s the perfect cold weather comfort food.  I make it only about once a year since my husband isn’t much of a fan.  It’s too much to eat myself.  I freeze the leftovers in one or two serving portions and eat them throughout the winter months.  I’ve tried a few recipes in the slow cooker and they were…fine.  This one, however, had my non-stew-eating husband go back for seconds.  Everyone should have a foolproof stew recipe. I think I found mine.

Of course it’s from my always-the-first-stop cookbook, America’s Test Kitchen Family Cookbook.  I also found another highly reviewed stew recipe of theirs online but it requires some ingredients that I didn’t have (I was not going out in the cold to grocery shop!)and had a couple more steps. Sounds really good – maybe next time.  Doesn’t matter – I thought this was delicious.  It absolutely hit the spot and will be fantastic warmed up tomorrow.

The recipe is below. A couple notes:

  • This takes about 3 hours.  It’s only about 45 minutes of hands on work but it’s not something you can whip up when you get home from work unless you eat really late.
  • Make sure you really brown the meat.  Here’s a link where ATK talks about browning the meat and gives the other stew recipe I mentioned above.
  • I used more potatoes and peas.  No reason, I like them.  Just FYI as you look at the pictures.

Beef Stew from The America’s Test Kitchen Family Cookbook

  • 1 3lb boneless beef chuck roast (mine was called a chuck eye roast), trimmed and cut into 1 1/2 inch cubes
  • salt and pepper
  • 3 tablespoons vegetable oil ( I definitely used more)
  • 2 onions, minced
  • 1 tablespoon tomato paste
  • 2 garlic cloves, minced
  • 3 tablespoons all-purpose flour
  • 1 cup dry red wine
  • 2 cups low sodium chicken broth
  • 1 tablespoon minced fresh thyme or 1 teaspoon dried
  • 2 bay leaves
  • 1 1/2 pounds red potatoes, scrubbed and cut into 1 1/2 inch chunks (I probably used a little over 2 pounds)
  • 4 carrots, sliced thin
  • 1 cup frozen peas (I used 1 1/2 cups)

Adjust an oven rack to the lower-middle position and pre-heat oven to 300 degrees.  Pat the beef dry with paper towels, then season with salt and pepper.

Heat 1 tablespoon of the oil in a large Dutch oven over medium-high heat until just smoking.  Brown half of the meat (see link above), about 10 minutes, then transfer to a plate.  Add 1 more tablespoon of oil and brown the rest of the meat and transfer to a plate.

Add the remaining tablespoon of oil to the empty pot and turn to medium heat.  When oil is shimmering, add the onions and cook until softened, about 5 minutes.  Stir in the tomato paste and garlic and cook for 30 seconds.  Add the flour and cook for 1 minute.

Slowly stir in the wine, scraping up the browned bits.  Stir in the broth, thyme, bay leaves, and browned beef, along with accumulated juices.

Bring to a simmer, cover and transfer the pot to the pre-heated oven.  Cook for 1 hour.

Stir in the potatoes and carrots.  Cover and continue to cook in the oven until the beef is tender, about 1 hour. Since I added extra potatoes and they were cut pretty big, I added another 10 mins.

Remove from the oven and stir in the frozen peas.  Remove bay leaves.  Let stand off the heat for 5 minutes.  Season with salt and pepper to taste.

IMG_4009_edited-1web

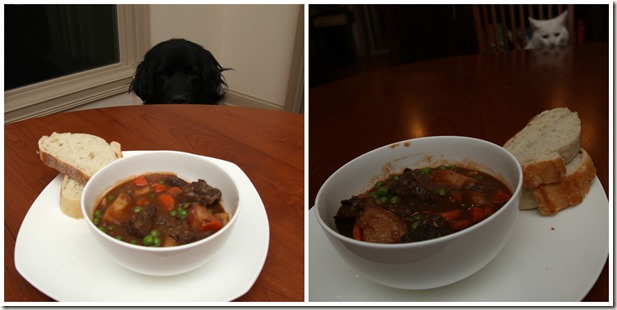
We ate it with crusty bread and it was perfect for this cold winter evening.

Look at these two yahoos.  I was trying to get a couple shots before eating.  No matter the angle, one of them is there to photobomb.

stew photobomb

Rocky Road Fudge Brownies

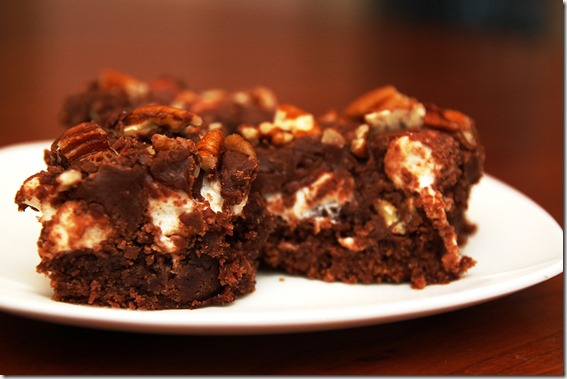
IMG_3976_edited-1web

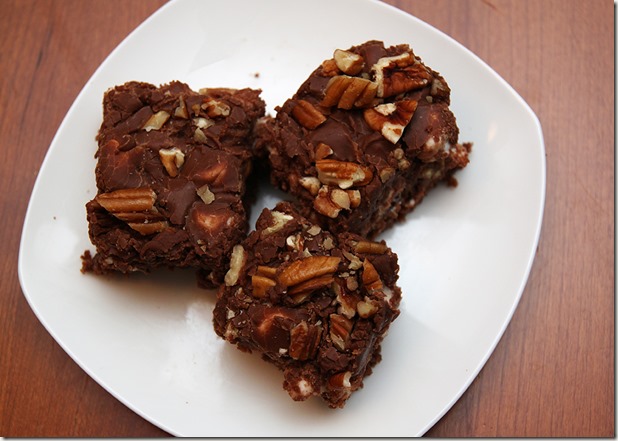
Ok, so these won’t help with your New Year’s resolution to eat better.  But, if you’re stuck inside due to the bitter cold like we are in the Midwest, they’re super easy to make and you likely already have the ingredients in your pantry.

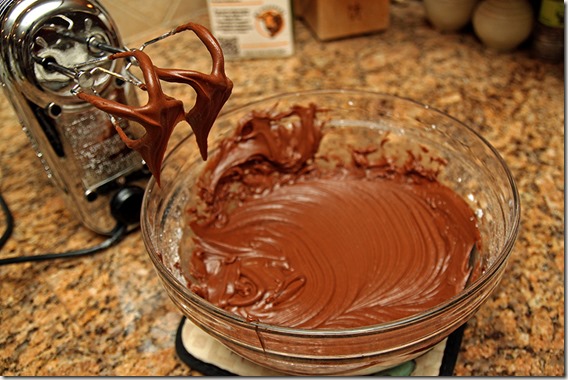
They start with boxed brownie mix which makes them a great option when you don’t have time to make something from scratch.  The whole process probably takes 40 minutes, including baking time.  I made these after work to take to dinner at our friends’ home that evening.  The icing elevates the boring box mix and adds homemade taste.  It also adds a lot of sweetness – cut these in small pieces!

My mom has been making these brownies forever but I think it’s my first time.  I don’t know where the recipe originally came from since it’s one that was copied and in my recipe book for years.

Here’s the recipe:

  • 1 package of brownie mix (one that is large enough for a 13 x 9 pan)
  • 1 cup chopped pecans
  • 3 cups miniature marshmallows
  • 2 (1 ounce) squares unsweetened chocolate
  • 1/3 cup milk (I used a little more to thin frosting)
  • 1/2 cup butter
  • 1 package (16 oz) confectioners sugar, sifted.  (I just realized I was supposed to sift the sugar – oops – it turned out fine.)
  • 1/2 teaspoon sugar

Prepare brownie mix according to box.  Pour in 13 x 9 pan.  Bake according to directions (about 25 minutes).

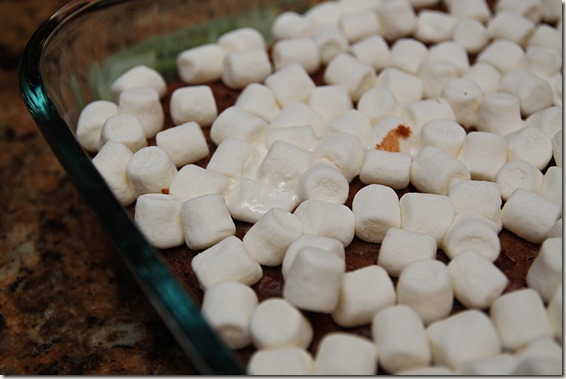
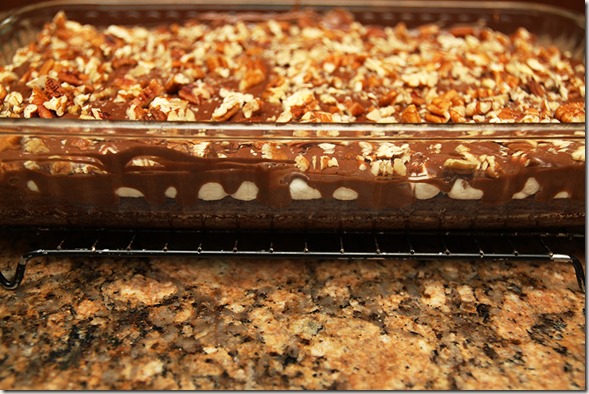
IMG_3957_edited-1web Remove from oven. Sprinkle miniature marshmallows over hot brownies.  (They will retain their shape but some will get soft and melty.  Mmm….)

Combine chocolate, milk, butter in a heavy saucepan.  Cook over low heat until chocolate and butter melt, stirring often. (I started this while the brownies were baking to save time.)

IMG_3960_edited-1web Remove from heat. Transfer to a medium mixing bowl.  Add confectioner’s sugar and vanilla. Beat at low speed until smooth.  If frosting is too stiff to spread, add milk, 1 tablespoon at a time, stirring until smooth.

IMG_3972_edited-1web Spread over brownies.  Sprinkle nuts over frosting.  Cool in pan on wire rack and cut into bars.

IMG_3977_edited-1web

Enjoy!

Sewing roundup – 2013

I’ve really been enjoying the roundups of fellow bloggers over the past few weeks.  Every December it amazes me just how many garments they make!  It’s incredible.  Sometimes I can go months without sewing anything.  All the same, I’m happy about the progress I made this year.  Here’s the wrap up:

recap1 recap2

The Good:

  • The garments I made this year actually get worn – I was more realistic about fabrics and styles.
  • When I looked back at the year, I completed 12 projects, averaging 1 a month. That surprised me! I definitely go in spurts.  Nothing gets done in the late summer and fall due to lots of work travel.
  • I’m learning more about what fitting adjustments I normally need and how to do them.
  • I was a pattern tester for Christine Haynes’ Emery Dress.  That was fun! It also got me to try a silhouette that I normally wouldn’t. I didn’t post it here because I made it in remnant fabric and had fitting issues.  That wasn’t the pattern’s fault – her pattern and instructions are great – I was between sizes and needed bodice adjustments.  As a tester, you make one straight size to ensure the drafting is correct.
  • I found some patterns I already know I’ll make multiples of next year.
  • I embraced the muslin.  We all have fitting issues and while making muslins cuts down on the number of completed garments, it helped to make ensure those that are completed are worn.

The Bad:

  • The flip side of ‘embracing the muslin’ is that I spent a TON of time on fitting issues this year with fewer garments to show for it.  Without a finished product, it can feel like I did nothing.
    • There was a summer dress I wanted to make before vacation .  I made 2 or 3 bodice muslins before realizing I wouldn’t get the project done before leaving.  I never picked it back up upon returning.
    • I did at least 3 or 4 bodice muslins to work out my fitting issues on a “real” (non test) version of the Emery dress which took a lot of time.  The dress is done except for inserting the lining, zipper and hem.  It has been on my dress form for at least 3 months waiting to be completed.  I just have no reason to wear a dress like that in winter so it sits.  Boo, me.
  • The knit tops I made early in the year were duds.  That’s unfortunate since I wear knits in some form almost every day.
  • I bought too much fabric with grand plans for it.  Must sew from my stash in 2014!
  • Last January I made a goal to try to carve out some sewing time each week.  I didn’t even come close to that.

My favorite project(s) – This is a tie between the Saltspring Dress and my new pillows. Since one is home decor, I think I can have a tie.  I love the Saltspring dress and wish I would’ve made it earlier in the summer.  I’ll definitely make several next year.  It’s a perfect comfy and cool sundress.  I loved my Cambie dress too – I just don’t have occasion to wear it often.

IMG_3578_edited-1web             IMG_3865_edited-1web                       IMG_2841_edited-1web

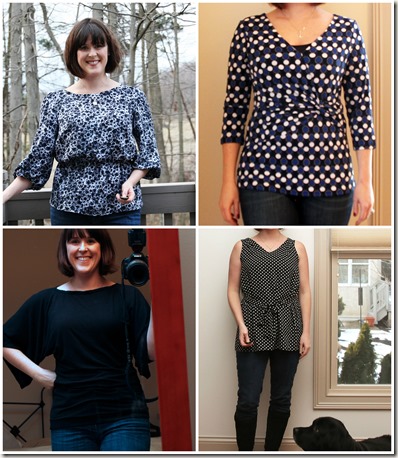
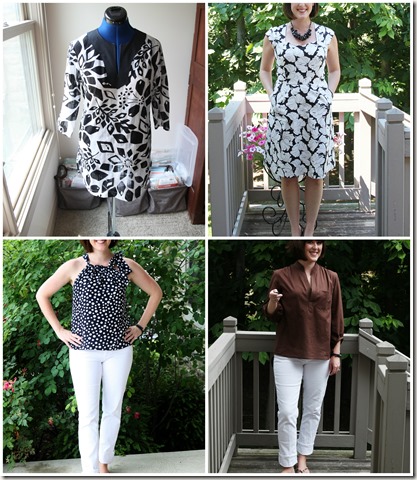
My least favorite garmentsSimplicity 1810 and Simplicity 2181 (the two polka dot tops below).   Both have fit issues and neither is flattering.  In fact, I’m not crazy about my first 4 garments of the year.  I like the floral blouse below, I’m just not in love with the fabric.  I purposely used a fabric I didn’t love for my first try at the pattern in case it bombed.  I should make a new version.

recap3

Next year:

  • I want to improve my fitting skills so that when I do make something, I wear it.
  • Sew more knits.
  • I’d also like to make more of an effort to sew regularly, even if it’s a few minutes here and there.  I’m more likely to finish something if I break it up in bite size pieces.

Have a Happy and Healthy New Year!

This Sewing Hobby Finally Paid Off!

IMG_3865_edited-1web

Hi!  Is anyone still out there?  I know I haven’t posted in forever.  I’ve done some garment sewing (countless muslins and am almost done with an Emery dress) but haven’t completed anything.  Mostly, I’ve been busy with work and not feeling the sewing mojo.  Until the time came for new throw pillows.

Over the past few months there’s been a lot of talk on sewing blogs about whether sewing saves you money.  For garments, my opinion is mostly “no”.  There’s just too much cheap, disposable fashion out there. If your skills are such that you can sew high quality construction with good fit and nice fabrics, then it’s good value to sew your own and have it fit like a glove (compared to high end RTW).  I will take a long time to get to that level.  I have a lot of thoughts on this topic – maybe a blog post for later.
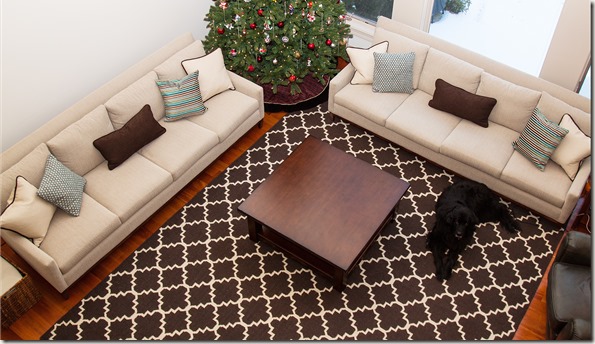
IMG_3846_edited-1web

I know this picture is odd – the sofas are so long I couldn’t get both in the same shot downstairs

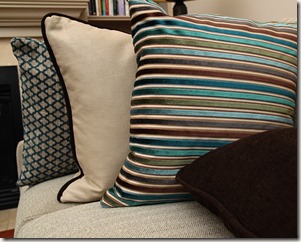
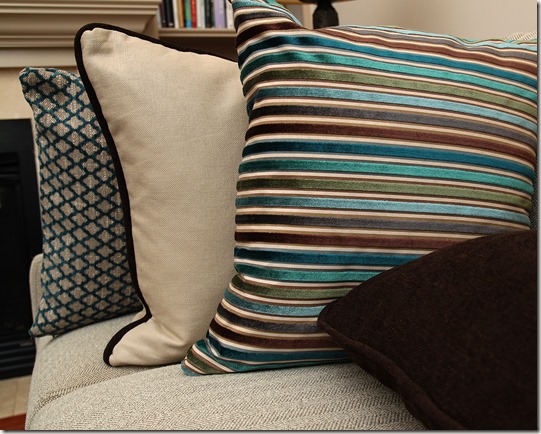
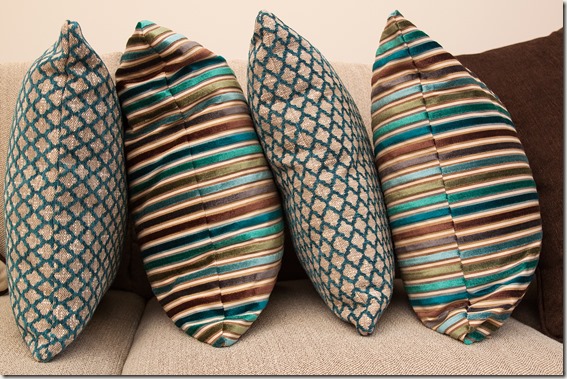
Anyway, home decor is one area I’m guessing most people would save money by sewing for themselves.  I know I did.  We got two new sofas this spring.  Both are super long –102” – and a basic taupe color.  I bought them thinking how easy it would be to sew and change pillows whenever I felt like it.  Ha.  So foolish. This simple throw pillow idea turned into quite the project.  The problem is the quantity of pillows needed.  You can see in the picture that the room and sofas are big – lots of pillows and multiple fabrics needed!  I wanted at least four relatively large pillows for each sofa made from at 3-4 fabrics that complemented each other.  They had to be cool colors to match our trim/sofa/walls, the brown had to be super dark like our rug, and no gold!  (We just got rid of two gold sofas and I was sick of it!)  I also wanted bold color or graphic prints – nothing fussy or traditional.  All those requirements combined meant I couldn’t find enough coordinating options at Target or Pottery Barn or wherever.  I do have some additional pillows from Target and Home Goods – they’re just not pictured here.  Pillows everywhere!

After much frustrating fabric shopping online and an overwhelming fabric showroom, I stopped by Calico Corners to get some ideas.  Out of all their books and my ridiculous criteria, I only found a few sets of fabrics I liked together. I would find two here or two there but I needed four that worked together.  Since I love blue and green, I went that route.  We planned out a few striped, a few patterned, and a bunch of solids with trim.  The fabrics were pricey so I requested quotes for fully completed pillows covers and the fabric alone.  I already had the pillow forms.  The cost for 10 pillows with trim and welting? $1200!!!  I about died.

So, that meant I was sewing.  I ordered the striped velvet and teal Moroccan patterned yardage from them and called it a day.  I special ordered the solid colors at Joann while on sale with a friends and family coupon.  I had to live without the fringe trim and make my own welting.  All in all, I probably saved at least $800!!  Actually, I never would’ve paid that quote even if I couldn’t sew.  But, it’s pretty cool to get similar pillows for much, much, much less.  I should’ve had more savings but I ordered too much fabric.
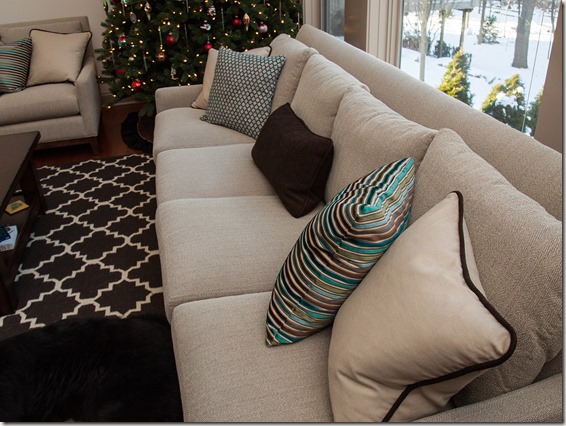
IMG_3852_edited-1web

Figuring out the fabric needed was tough due to the welting cord.  I knew I needed to make bias strips.  But how much fabric for the dozens of yards of cord?  When the fabric is $40-$50 a yard, you want to be right!  I finally found a link on McCall’s quilting site that was wonderful.  It tells you how much fabric is needed depending on the width of the strip and the length required.  It provides directions and a video for making continuous bias strips from a piece of square fabric. Check it out – it’s very helpful: Continuous Bias
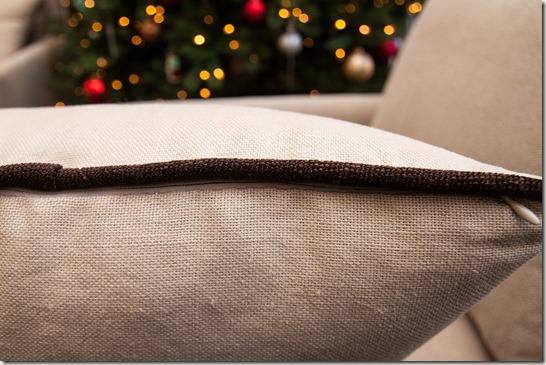
IMG_3839_edited-1web

I made several mistakes but now that I’m farther away from it, it’s not worth even writing about.  There are some tips I learned worth noting:

The construction wasn’t hard.  It was time consuming because I had to hand sew both sides of ten zippers – my sides never matched up properly using the machine and invisible zipper foot.
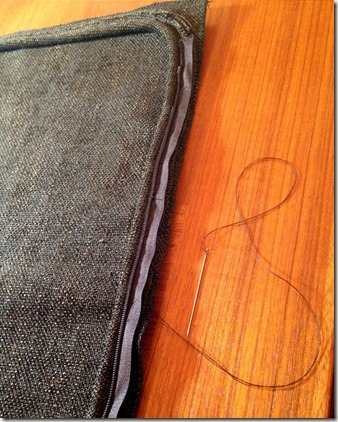
welt_edited-1

When making the welt cord, cut the bias strip wider than you think you’ll need.  Most tutorials tell you to cut the width equal to the diameter of the cord plus twice the seam allowance.  That would work with thinner fabrics but not upholstery weight.  You can always trim it back but sewing along the cord with a too-small seam allowance is a PAIN. Add an extra 1/4”.

I had better luck cutting the fabric the size of my pillow form.  Some tutorials will tell you to cut it 1/2” -1” larger than the form.  I think that would be too loose, especially for down inserts. It will be even smaller once it’s sewn but that’s ok (mine was an inch smaller after 1/2 SA on each side.)  You want it to be stuffed in there.  For a couple pillows, (the ones without the welt) I went back and made them even tighter.

I bought a book which was helpful and will be even better if I try more ambitious styles.  Sew Sensational: Pillows

The first covers I sewed were made from the solid brown fabric.  I figured my mistakes wouldn’t be as visible.  It was a good move.  I learned to put the zipper and the cord join on the same side – that way you can hide them both based on how you position the pillows. Once I had a couple covers under my belt I knew the pitfalls and did the remaining sets assembly line style.
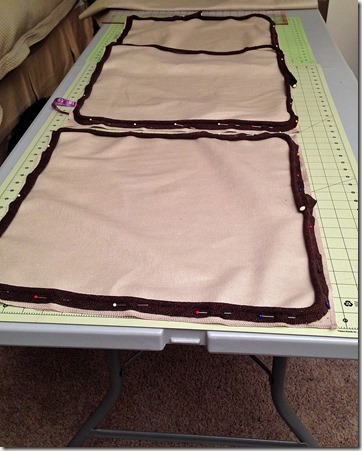
assembly line

Take time thinking about which sides you want to match and on which sides you want the zipper. If there are stripes, you’ll have to match your zipper with one color and plan your cutting around that.
IMG_3861_edited-1web

Overall, I’m happy with how they turned out. I finally have some color in the family room.   My stripe and pattern matching was so-so and really good, depending on the pillow.  I can live with that.  My corners aren’t quite sharp on the welted pillows but that won’t keep me up at night either.  I can rest easy thinking of the crazy money I didn’t spend on custom pillows and feel satisfied I at last made something for the house.

Sewaholic Saltspring

IMG_3584_edited-1web

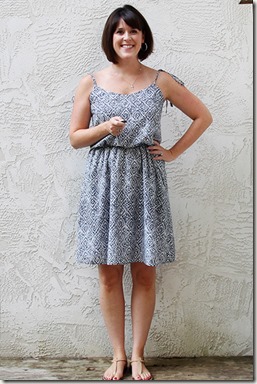
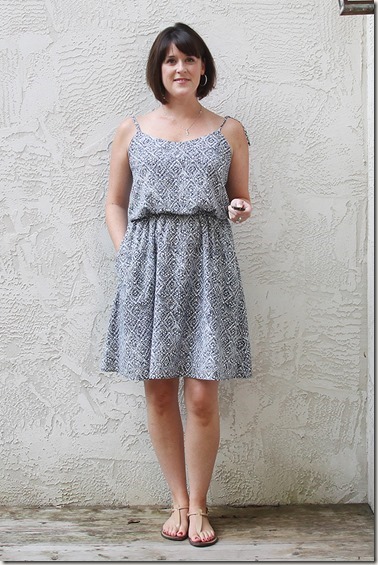
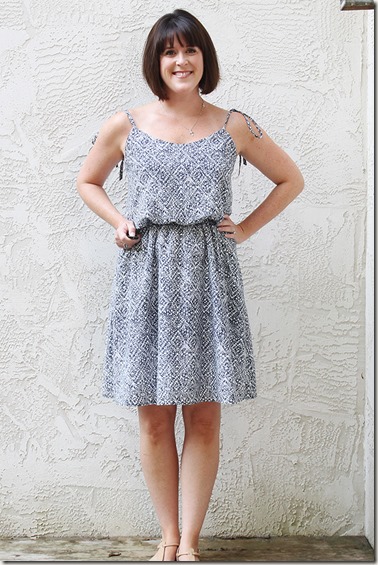
The days are shorter, the evenings are cooler, school has started and Saturdays are for football.  Fall is definitely here.  So what do I do?  Sew my first sundress of the summer.  What?  Well, I’m glad I did.  I love it.  I wore it today, probably the last hot day of the year, and it has all the elements of something to wear everyday in the summer.  It’s adjustable with the straps, has pockets, and is comfortable and cool.  I just wish I had the pattern before I went on vacation – I would have made a bunch!
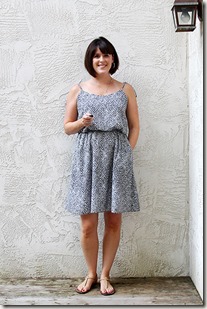
I picked up the Sewaholic Saltspring at a cute shop in Columbus, Sew to Speak.  They’re my local source for Sewaholic patterns especially when I get an idea in my head and just have to start that day –no waiting for shipping from Canada.

This is my third Sewaholic pattern and like the others (Renfrew and Cambie) it didn’t disappoint.  Pretty yet wearable style with good instructions.  They posted a sewalong and I sewed with my ipad right next to my sewing machine.  It was such a great way to go through the project. 

There are things I really like about the dress and some I would change next time (and I anticipate making several versions next summer.)IMG_3505_edited-1web

The blousy bodice is not something you have to fiddle with all day.  It is cleverly designed – the outer layer is longer than the lining so when you sew the edges together the blousiness (made up word, I know) doesn’t move or require a belt.IMG_5703_edited-1web

I’m not crazy about the split in the back.  Even if I had put in a zipper and the sizing was good for me (more on that later) it looks unfinished.  The picture above is just pinned together where the zipper should be but you can get the idea.  The elastic at the waist would pull the sides closer and the top couple inches are stitched down but it would show your lining as you moved.  I didn’t realize it was like that until construction.

It was at this stage I could finally try on the bodice.  It was way too big.  By this time, I couldn’t take it in on the sides without taking apart all my work; the only place I could adjust was the center back. So, I sewed the center back together but in order to catch both sides (the outer flappy parts) I had to take it in quite a bit –at least an inch.  It fits fine but the back doesn’t lie well.  IMG_3592_edited-1web

I also wish the pattern included directions for a skirt lining.  This dress is perfect for light airy fabric. But, if the fabric is like my voile, it’s too sheer to wear in bright sunlight without a lining.  Sewaholic was smart, though, and posted a work-around on their blog.  The straps almost sent me over the edge.  I ended up cutting new straps after some mishaps turning the first two right side out.  With this fabric I needed more room when turning so I would recommend smaller seam allowances.  In fact, I think I’ll try non-tie straps next time.

Sizing – I fell between sizes for the bodice so I cut the 10 thinking I could take it in later.  I didn’t think through the order of construction  – it doesn’t allow for that.   It was huge! After taking in the back I ended up right about the size 8. Next time I’ll cut the smaller size.  That way, rather than the dress only being reduced in back, it’ll be more proportional.  I also don’t see the need for a zipper so I’ll just cut front and back on the fold.  The dress is somewhat short.  I wasn’t able to get the 1” hem.  I just serged the bottom and folded it up.IMG_3571_edited-1web

Even with those tweaks, I really like the dress and will definitely make more for next summer.  I would love to try the maxi version.

Summer Berry Pie

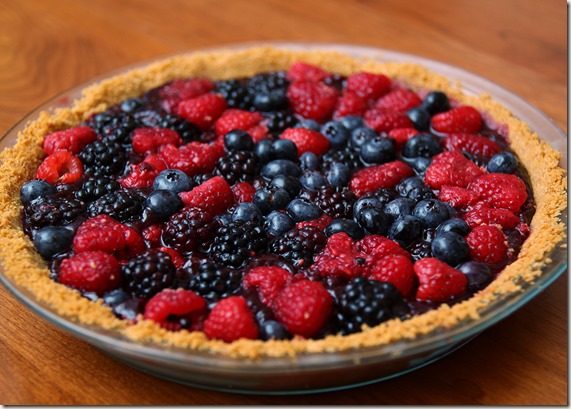
IMG_3474_edited-1web

Don’t you just love all the berries that are in season during the summer?

This pie is great because the fresh berries are truly the star, not a sickeningly sweet glaze or fruit baked down to nothing.  Of course it comes from my favorite cookbook, America’s Test Kitchen Family Cookbook.  I found the recipe already published online.  You can find it here: Summer Berry Pie.

IMG_3492_edited-1web

You have to really love berries to enjoy this – the most dominant flavor is the fresh, raw berries.  The sweetness comes from a filling made of a berry puree combined with sugar and cornstarch which is reduced and thickened on the stove. Another neat touch is coating the berries with melted currant jelly so they stay glossy.

You can see the delicious filling in the photo below. The filling is spread over the crust and berries are (gently) pressed into it.

IMG_3481_edited-1web

A couple notes:

– My berries were a bit tart so I added extra sugar to the filling. It’s worth tasting them first.

– This takes a lot of berries – 6 Cups – so it’s ideal for summer when it won’t cost a fortune to make just one pie.

– My cooking time for the puree was at least double, maybe more.

– I’m sure the recipe for the graham cracker crust is fine.  Mine tasted good but was a little hard in areas and crumbly in others.  Likely user error – I had the same problem with my key lime pie.

-The recipe online calls for apple jelly.  The cookbook says either apple or red currant.  I used red currant and it was tasty.

There’s not much else to say except it is delicious and fresh tasting and you should try it!

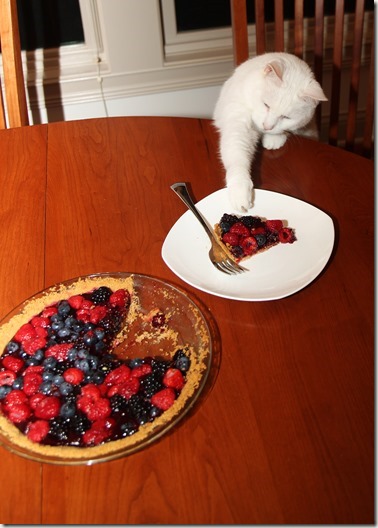
I turn my back for a second…IMG_3477_edited-1web